A simple introduction to Node-RED
Node-Red is a “low-code” programming solution. It allows you to create simple programs or “flows” that can be used to accomplish many simple programming tasks with little or no programming knowledge. It provides a browser-based UI where wires can be used to connect nodes.
The image above shows a simple flow, illustrating how Node-Red works. Notice the wires connecting nodes. A flow generally starts with a blue input node. In this flow, it’s called Verify Certificate. The input node is used to start a flow (similar to a start button). In this case, it is used to inject a JSON certificate into the flow.
The purpose of this flow is to send a JSON certificate to the S1Seven servers and verify whether or not that certificate has been notarized on the blockchain.
The input data then flows along the wires between nodes from one node to the next. In this case, the second node sends an HTTP request (similar to what happens when you open a webpage) to the S1Seven servers. This particular node has been configured to send a JSON certificate to the S1Seven servers, and then pass the data that is sent back by S1Seven to the json node.
The json node takes JSON data as input and parses it as an object (a common machine-readable data structure used in programming). Then that parsed data is finally passed to the green node, which simply prints the data that has been passed into it.
To use Node-Red, it is not necessary to know all the details of how each node works, you simply need to select the nodes that do what you need and connect them to your flow.
The best way to learn to use Node-Red is to dive right in and play with it.
Installing Node-Red
There are many ways to install Node-Red, including in Azure or AWS: https://nodered.org/docs/getting-started/. This guide will show you how to install Node-Red locally on your machine.
Mac:
Node-Red depends on a program called Node. Node is an environment that allows you to run JavaScript code on your machine. First, you need to download and install Node from the following link — be sure to download the current LTS version:
Download | Node.js
Once you’ve downloaded the file, open it and follow the installation instructions to install Node. Once Node is installed, open the Terminal app and type in node --version to check that node is correctly installed. It should output something similar to v16.14.2 if it’s successfully installed.
Now we are able to continue installing Node-Red. Still in the Terminal app, input this text: sudo npm install -g --unsafe-perm node-red.
Now hit enter to start the installation. You will know that it is installed successfully when you see something like the following text:
+node-red@1.1.0added 332 packages from 341 contributors in 18.494sfound 0 vulnerabilities
Once it is installed, type node-red into the terminal to run Node-Red. Then open your browser of choice and navigate to localhost: 1880 which is the default access point for Node-Red.
Windows:
Node-Red depends on a program called Node. Node is an environment that allows you to run JavaScript code on your machine. First, you need to download and install Node from the following link — be sure to download the current LTS version:
Download | Node.js
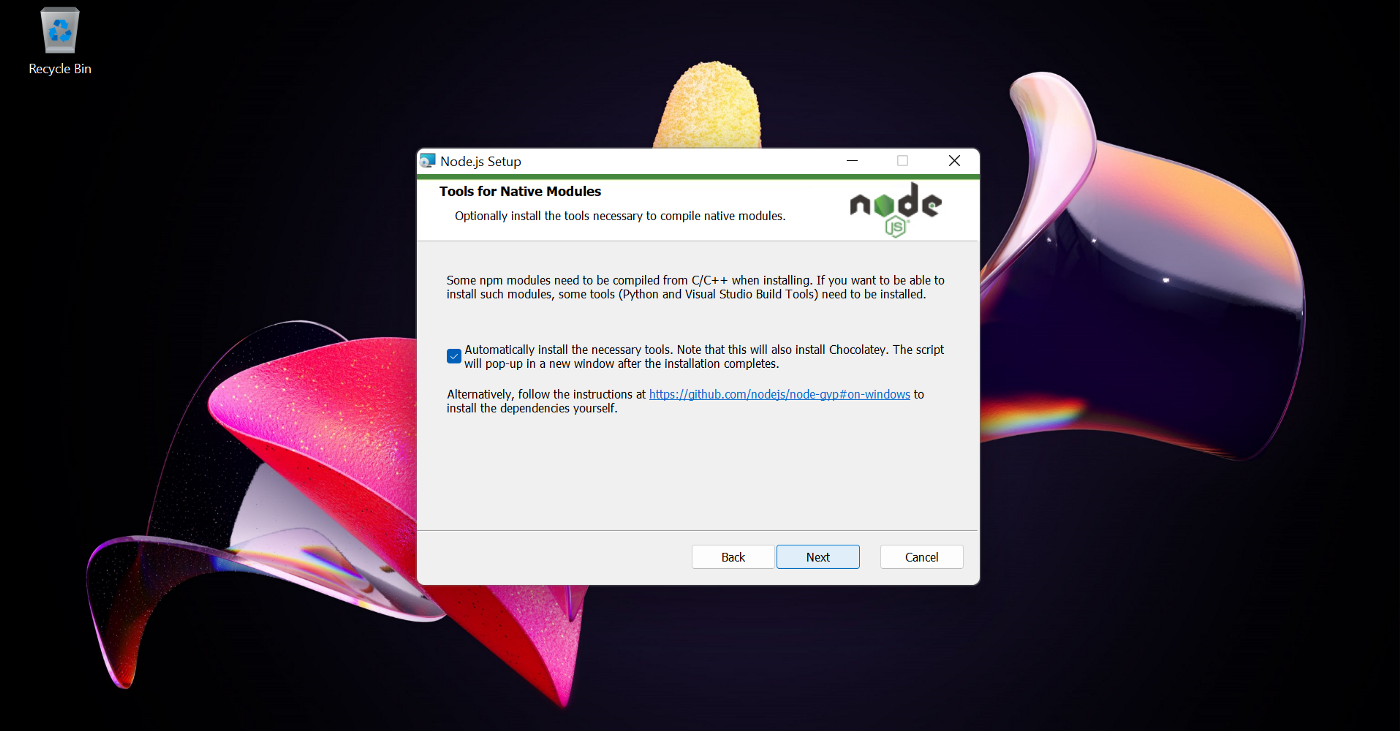
Once you’ve downloaded the file, open it and follow the installation instructions to install Node. Once you get to the following step, tick the box and continue with the installation. This will allow you to later install node packages that are compiled from C/C++, which may be needed to install some custom nodes for Node-Red.
Tools for Native Modules option
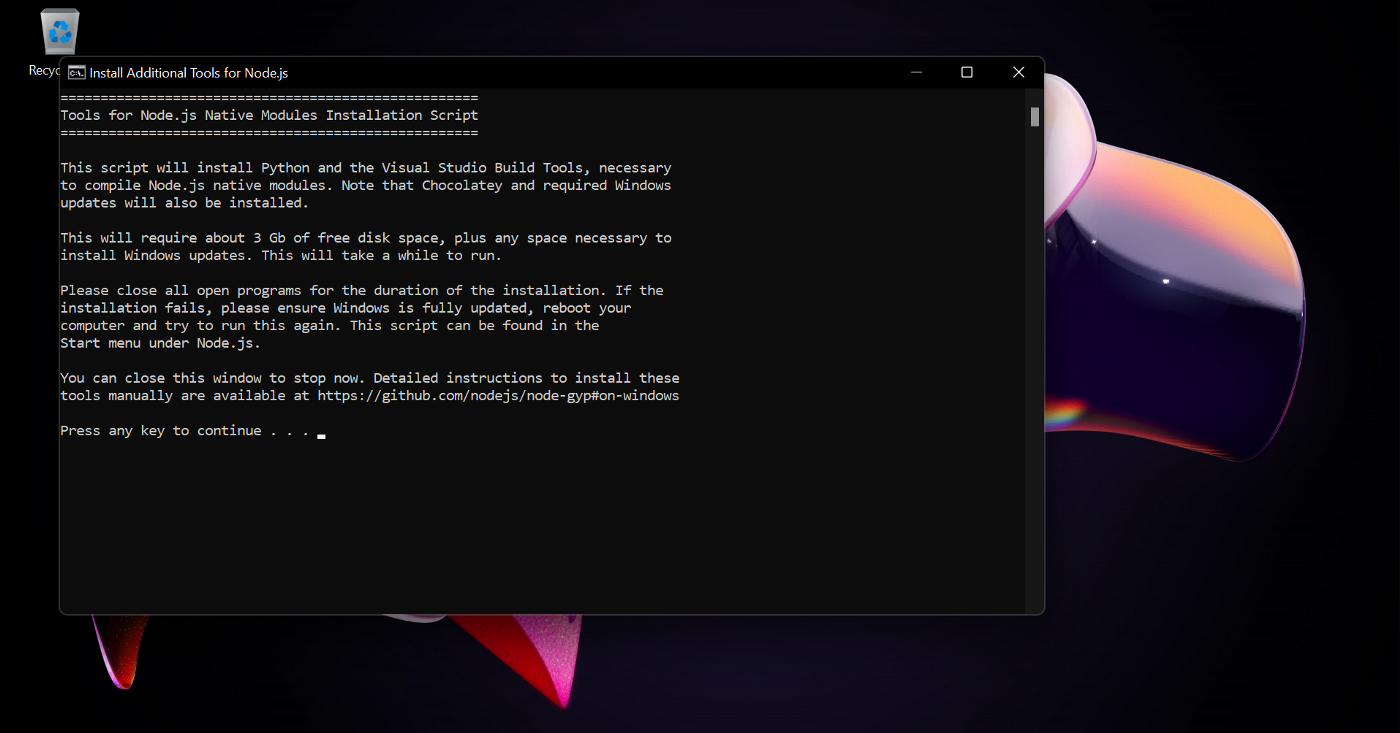
Once Node has finished installing, if you have checked the box as directed above, the following window should open automatically:
Tools for Native Modules installation
Press any key to continue, and follow the instructions until the software is installed.
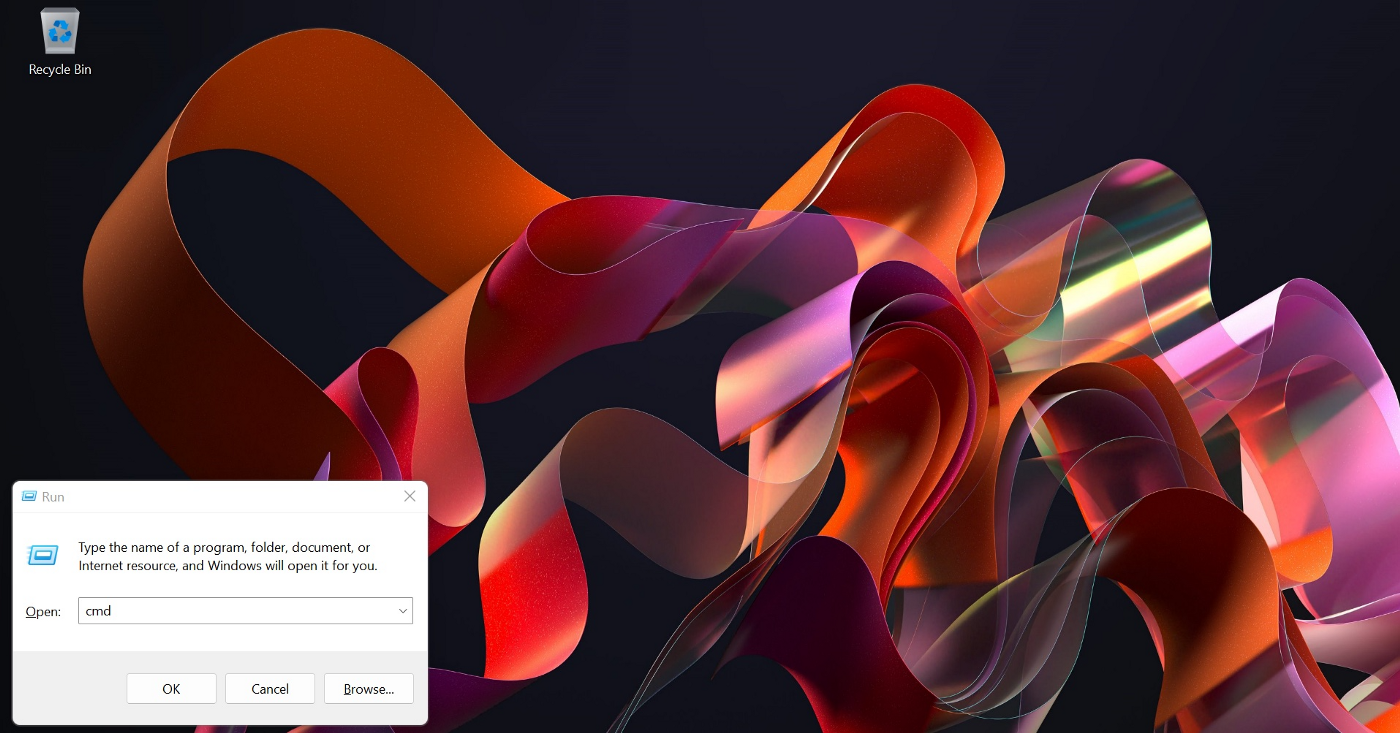
To verify that Node has been correctly installed, press the Windows key + R and type cmd to open the command window.
The Windows run box
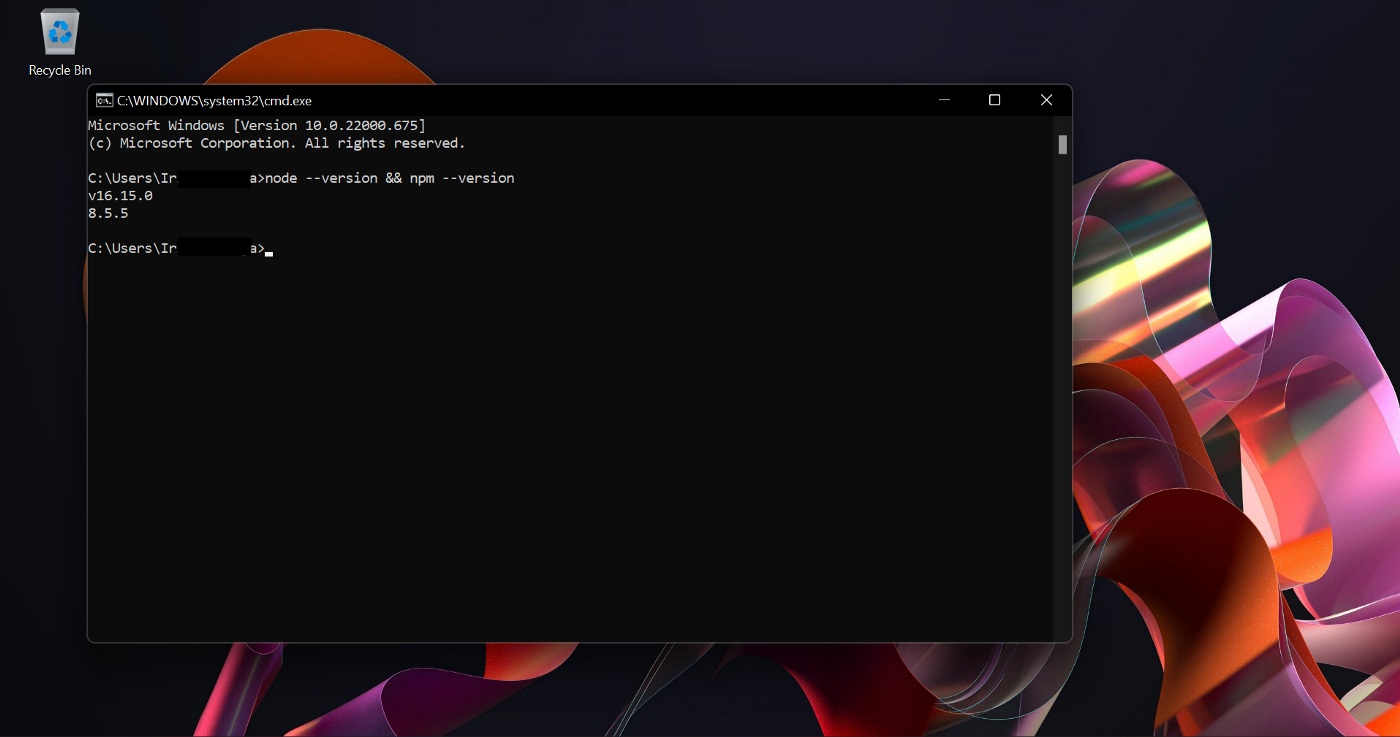
Once the cmd window is open, type node --version && npm --version and check that the output looks something like v16.15.0 as you can see in the screenshot below:
Verify that Node and npm have been installed
Installing Node-Red
While still in the cmd window, type npm install -g --unsafe-perm node-red which will install Node-Red. Once it is installed, type node-red into the console to run Node-Red.
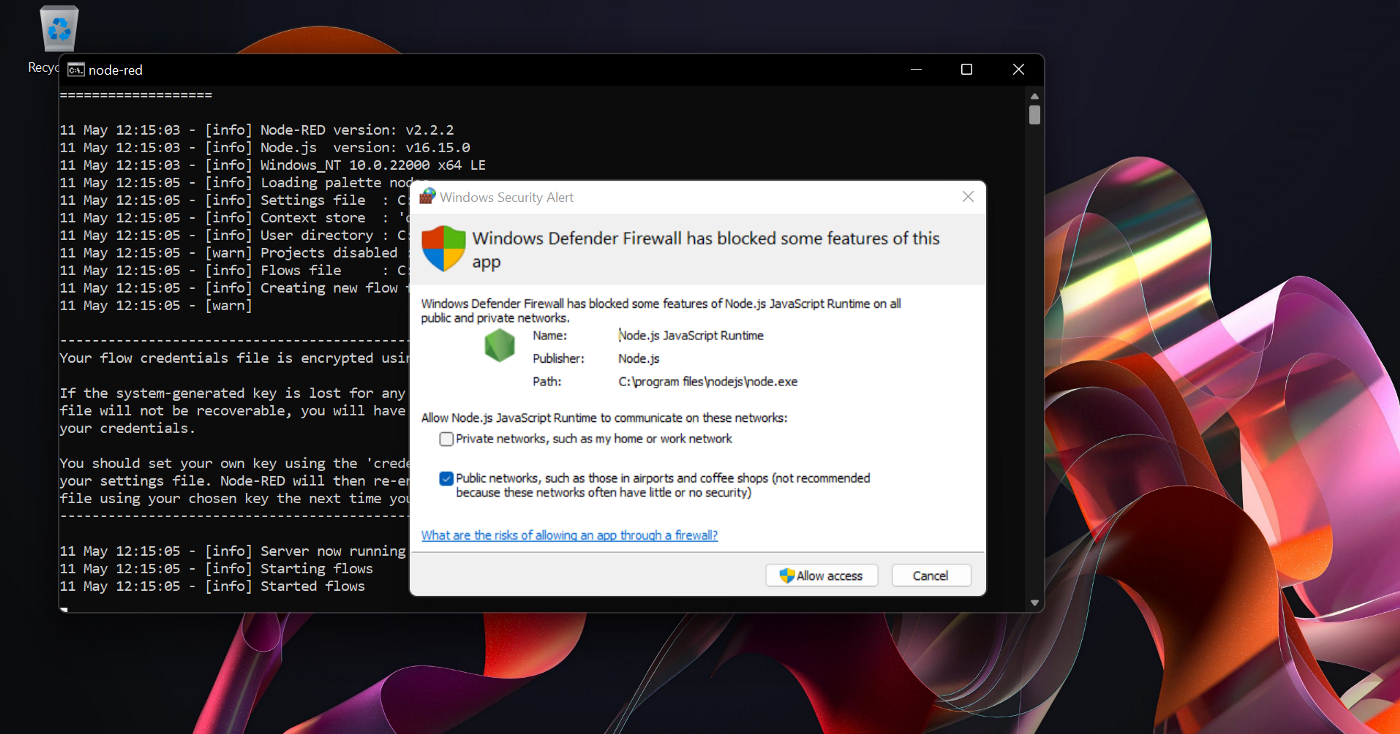
The first time that you run it, you may be prompted to allow Node access by Windows Defender on your local network, you should grant access by clicking the Allow access button.
Allow Node access on Private networks
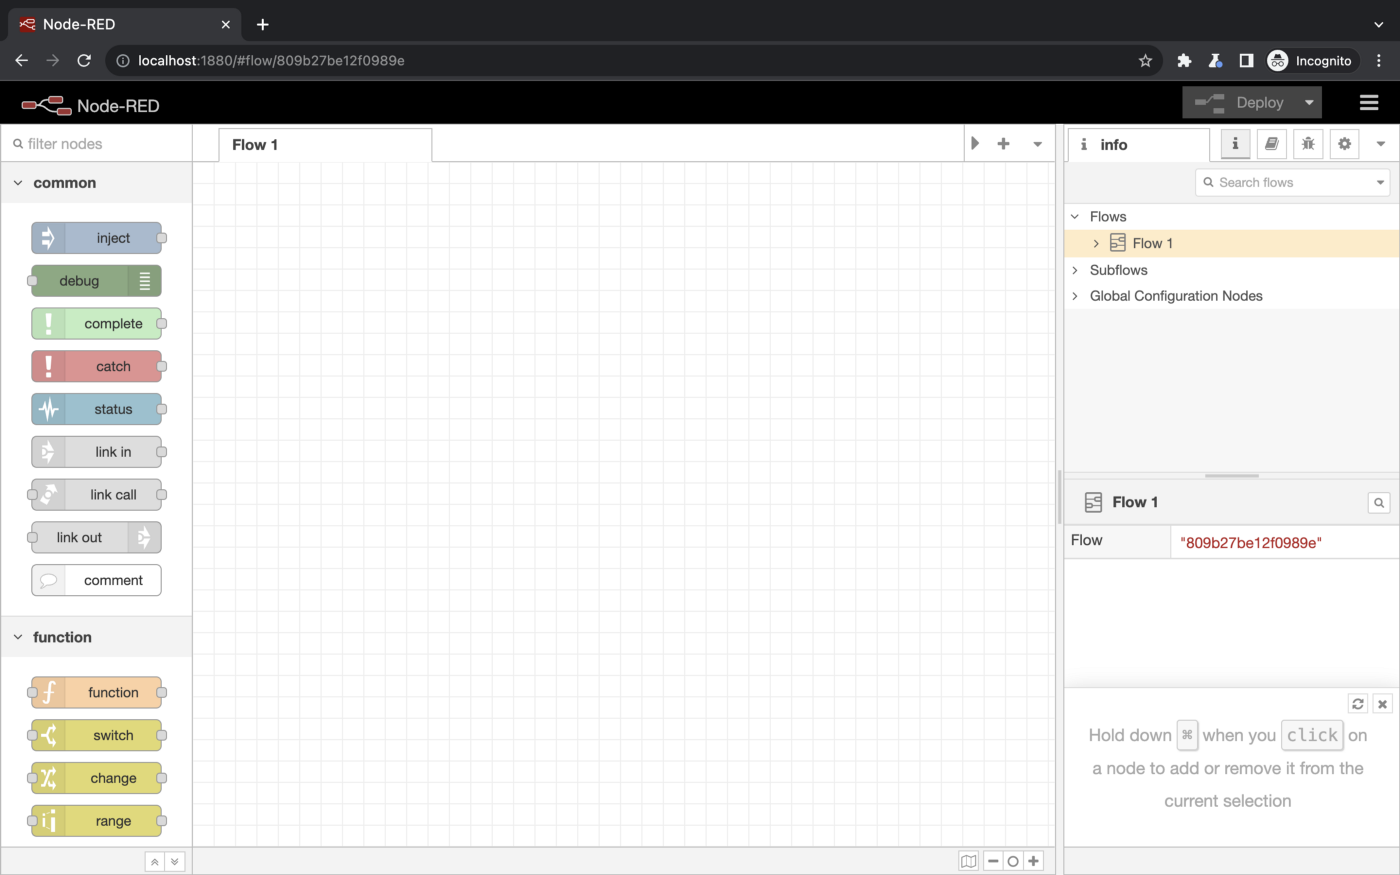
Now Node-Red should be up and running! Open your browser of choice and navigate to localhost:1880 which is the default access point for Node-Red. You should see something similar to the image below:
Node-Red initial screen
Getting started
The editor window contains three main sections:
- The palette on the left contains the nodes available to use.
- The main workspace is in the middle, where flows are created.
- The sidebar on the right shows information about flows, nodes, or the debug window.
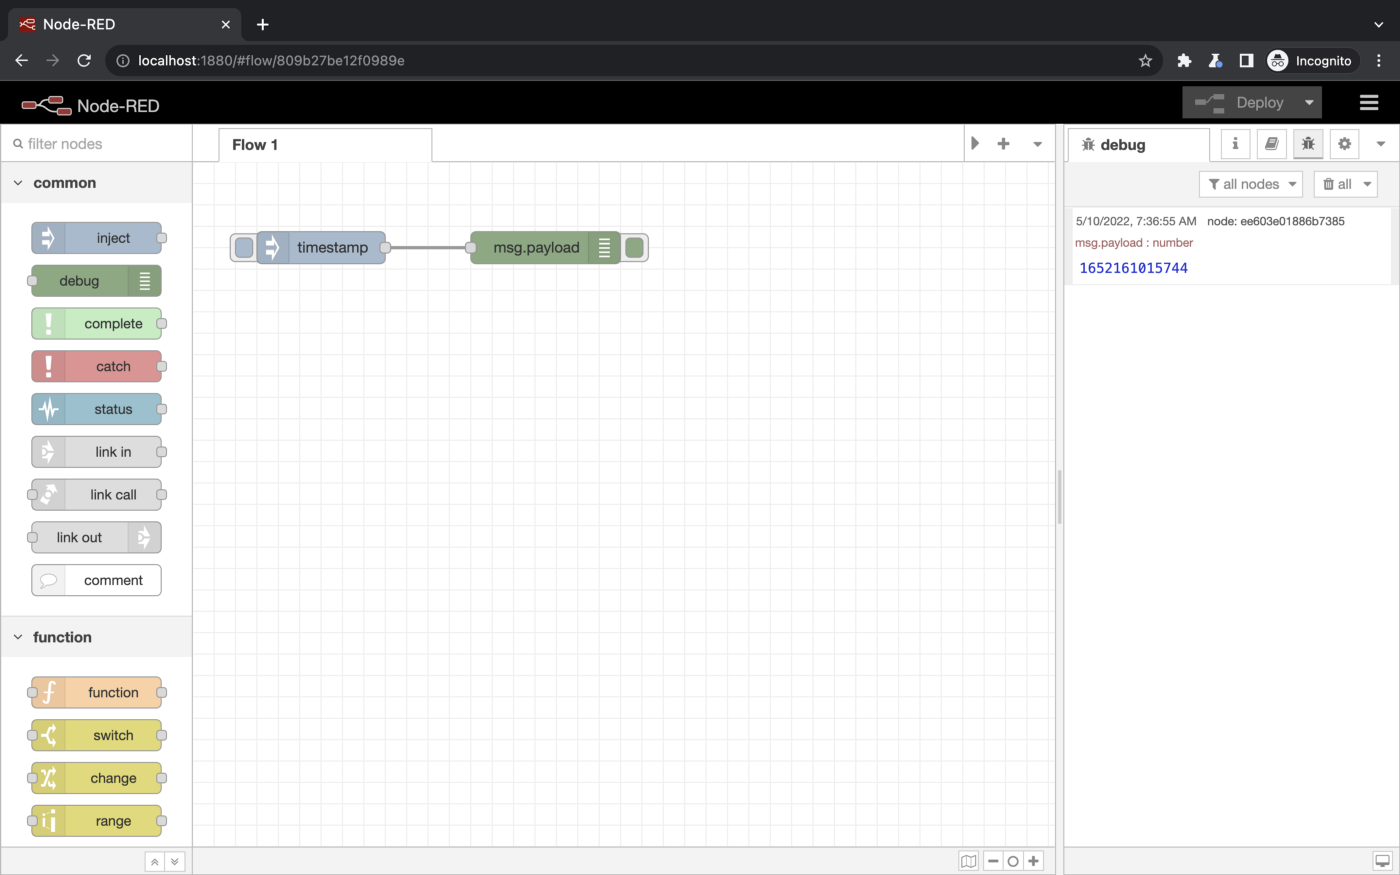
To get started, drag a blue Inject node from the palette on the left to the workspace in the middle. Also, drag a green Debug node to the workspace.
Click on the little grey dot on the right-hand side of the Inject node (its output port) to the little grey dot on the left-hand side of the Debug node (its input port). This will connect the two nodes with a wire, allowing data to flow between them.
Then click the red Deploy button on the top right of the screen. Now your changes are active and the flow can be used. In the sidebar to the right, click on the Debug tab (the third icon, the one that looks like a bug). Then click the inject button on the blue Inject node to start your flow. It should look similar to the screenshot below:
First Node-Red flow
The numbers to the right indicate the number of milliseconds since January 1st, 1970. You can click on the numbers to change the format to a more readable date. And that is the basics of how Node-Red works!
Of course, you want to be able to do more than just inject and print timestamps. The next section will show how you can interact with objects and data in Node-Red!
Interacting with objects
Node-Red works by sending msg (message) objects from one node to the next. If you are not familiar with the concept of objects from programming, you can think of them as being a bit like an email. We generally think of an email as one entity, but an email is made up of several fields: to, from, cc, body, etc.
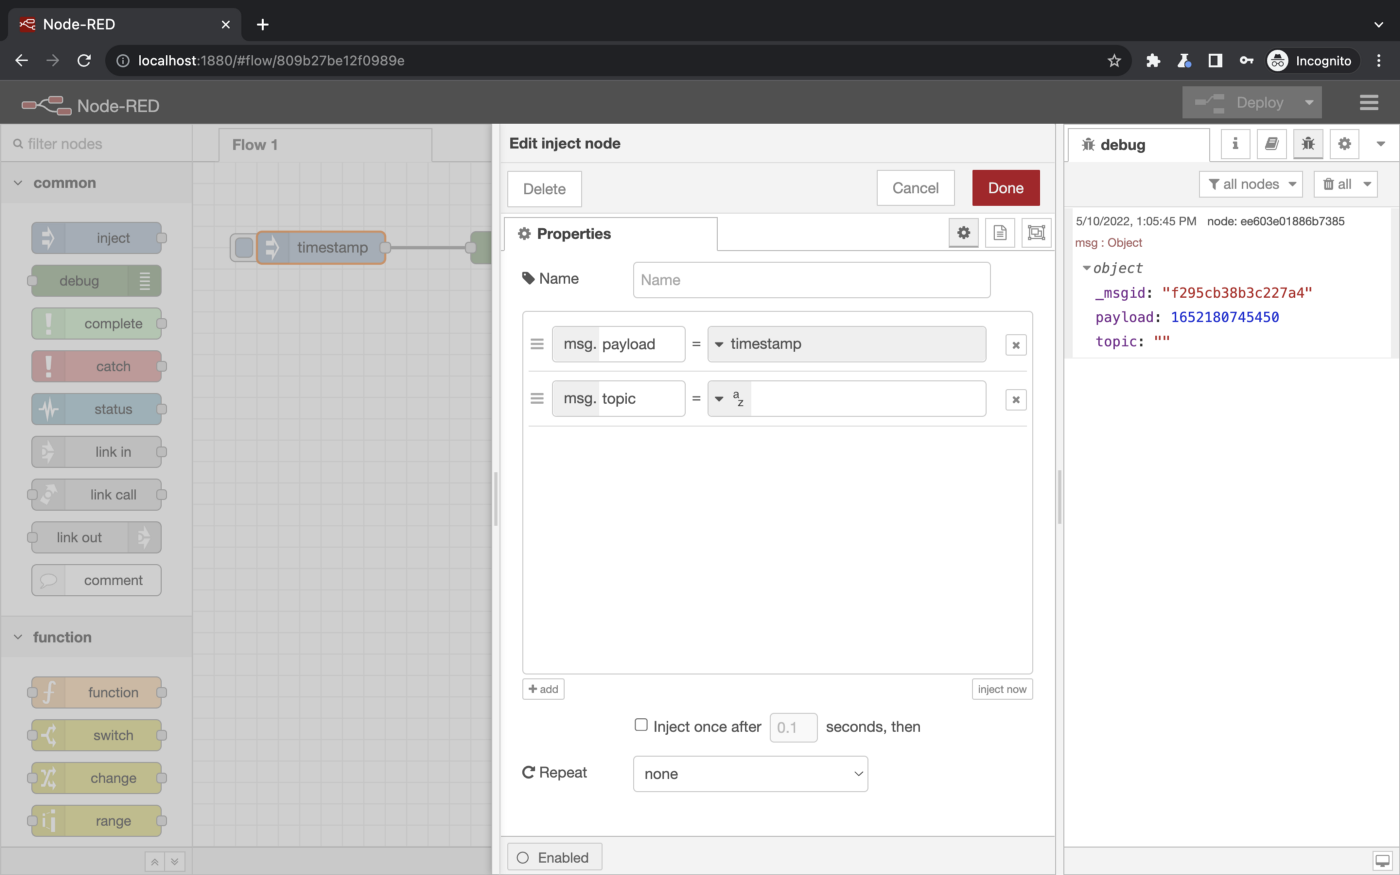
A msg object can be likened to that email in that it is one entity, but it can have multiple properties (fields). To illustrate, double-click on the blue Inject node. Here you can see the properties of the msg object. By default, msg.payload will be set to a timestamp.
msg.payload
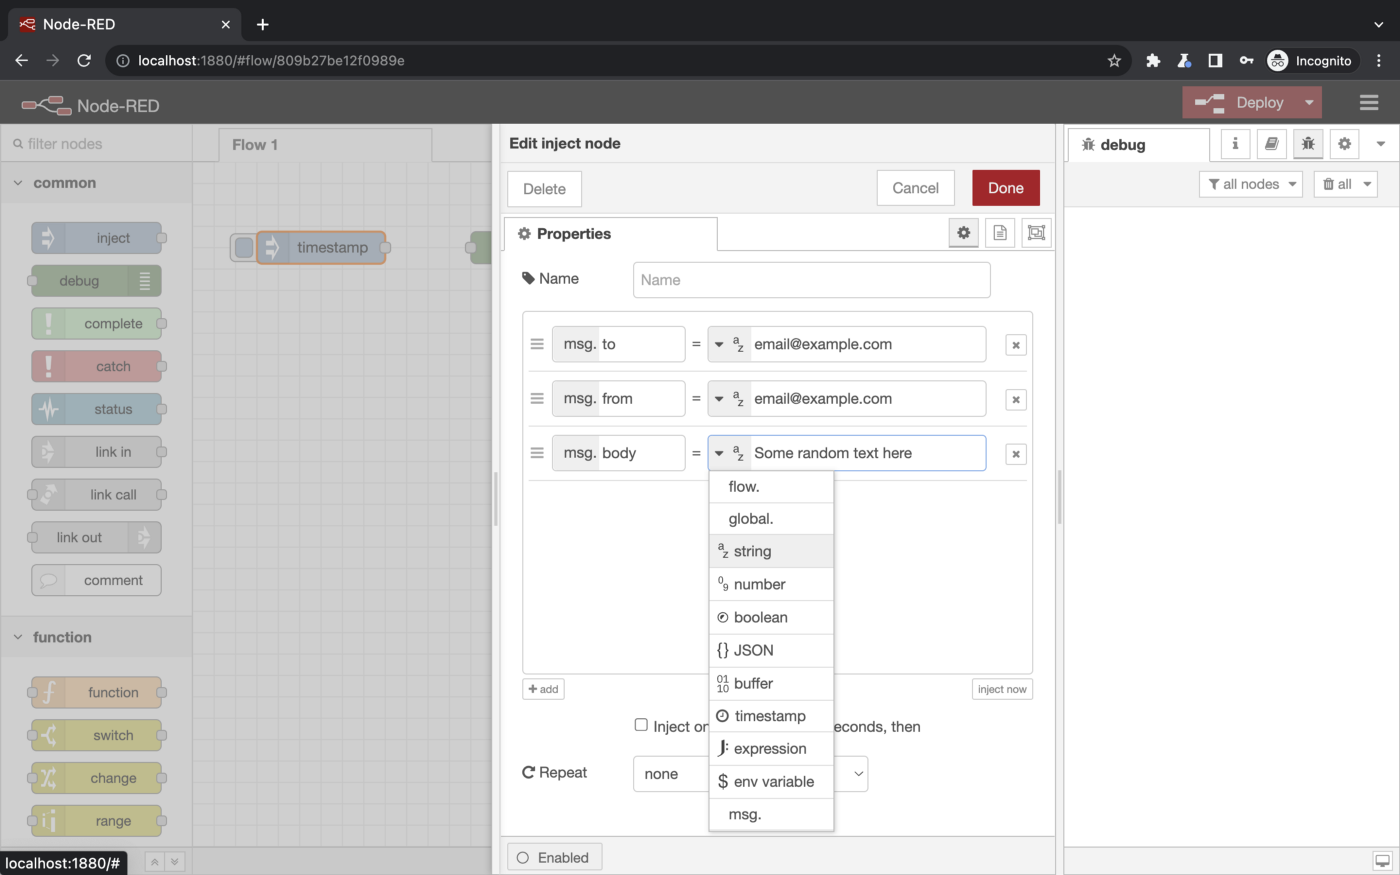
As you can see in the screenshot, there is a little + add button underneath the properties. Click on that button to add a new property. You can rename the property however you like. As an example, let’s simulate an email and set 3 properties, to, from, and body.
Click on the grey drop-down menu to the right of the = sign to choose what data type you want the property to be. There are several options including string (which represents text), number, and JSON. Select string, and type in email@example.com. Set the properties to the values seen in the screenshot below and click Done when finished.
Setting properties on the msg object
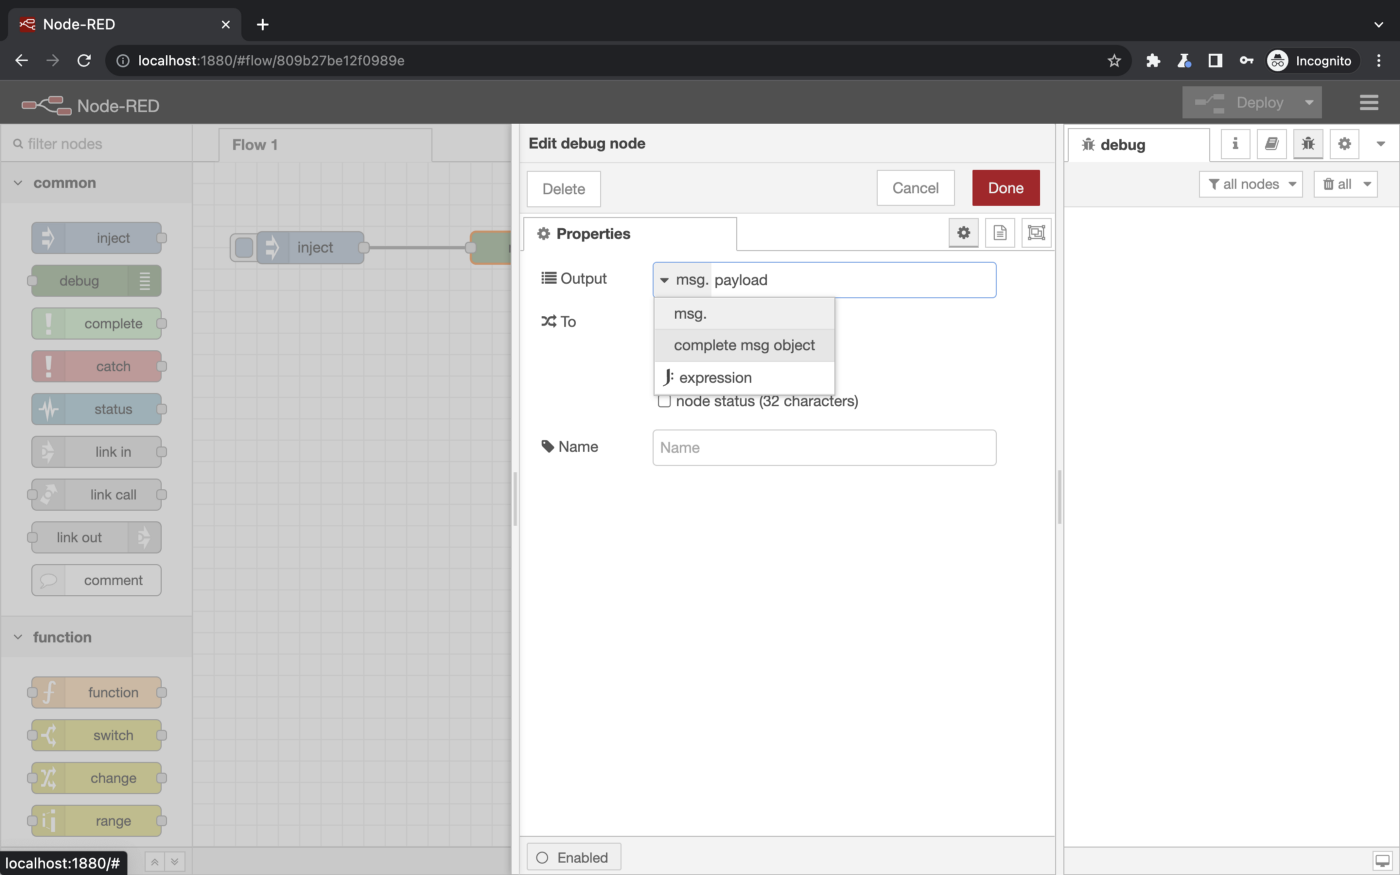
Before we do anything with that data, you need to understand how to access the data. Look at the green debug node. Double-click on it, and notice that the Output is set to msg.payload. That notation means that you want to access the payload property on the msg object.
If, for example, you wanted to access the to property that you have set on the msg object, you could change payload to to. However, we want to see all the properties on the msg object, not just one. So beside Output, click the grey msg dropdown and choose complete msg object as you can see in the following screenshot:
Select complete msg object
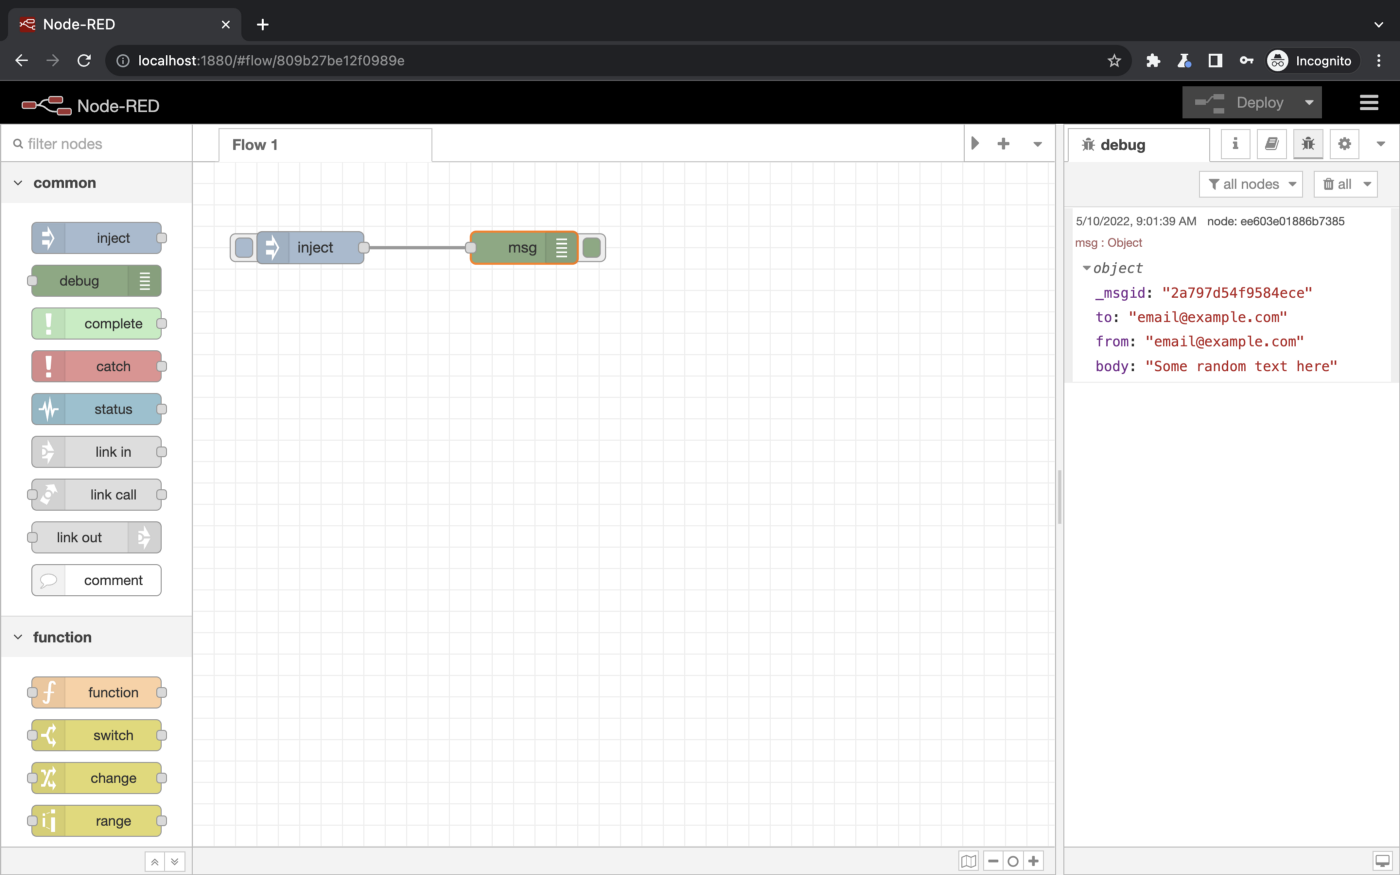
Now click the red Done button and click the Deploy on the top right to save your changes. Now when you click the inject button on the blue Inject node, instead of injecting a timestamp, the msg object will be sent to the debug node and printed in the debug section on the right side of your screen.
To improve the formatting, click once on the printed object. It should look similar to the screenshot below:
Our printed msg object to the right
As you can see, the msg object has four properties:
- _msgid — An internal id generated by Node-Red, you can ignore this.
- to — The email that you added
- from — The email that you added
- body — The text that you added.
Now that you know the basics of how flows and objects work in Node-Red, you can start playing around with some of our pre-made flows that interact with the S1Seven API or show use-cases for JSON certificates.
Links to some of our pre-made flows
To see flows related to interacting with the S1Seven API, click here.
To see flows showing how incoming certificates can be saved to Azure, click here.
To see flows that show how to extract properties from JSON certificates and plot them to a graph, click here.
To see a flow that shows you how to use S1Seven’s certificate tools to convert a JSON certificate to a PDF, click here.

 Eamon O'Callaghan